Activities
Alternative Arduino Hardware
The Arduino Uno is great for prototyping but it can be a bit large and expensive to leave in a project permanently. Luckily there is a whole range of alternative devices that can be used which are smaller and cheaper.
We will run through a few of those devices here.
Arduino Nano
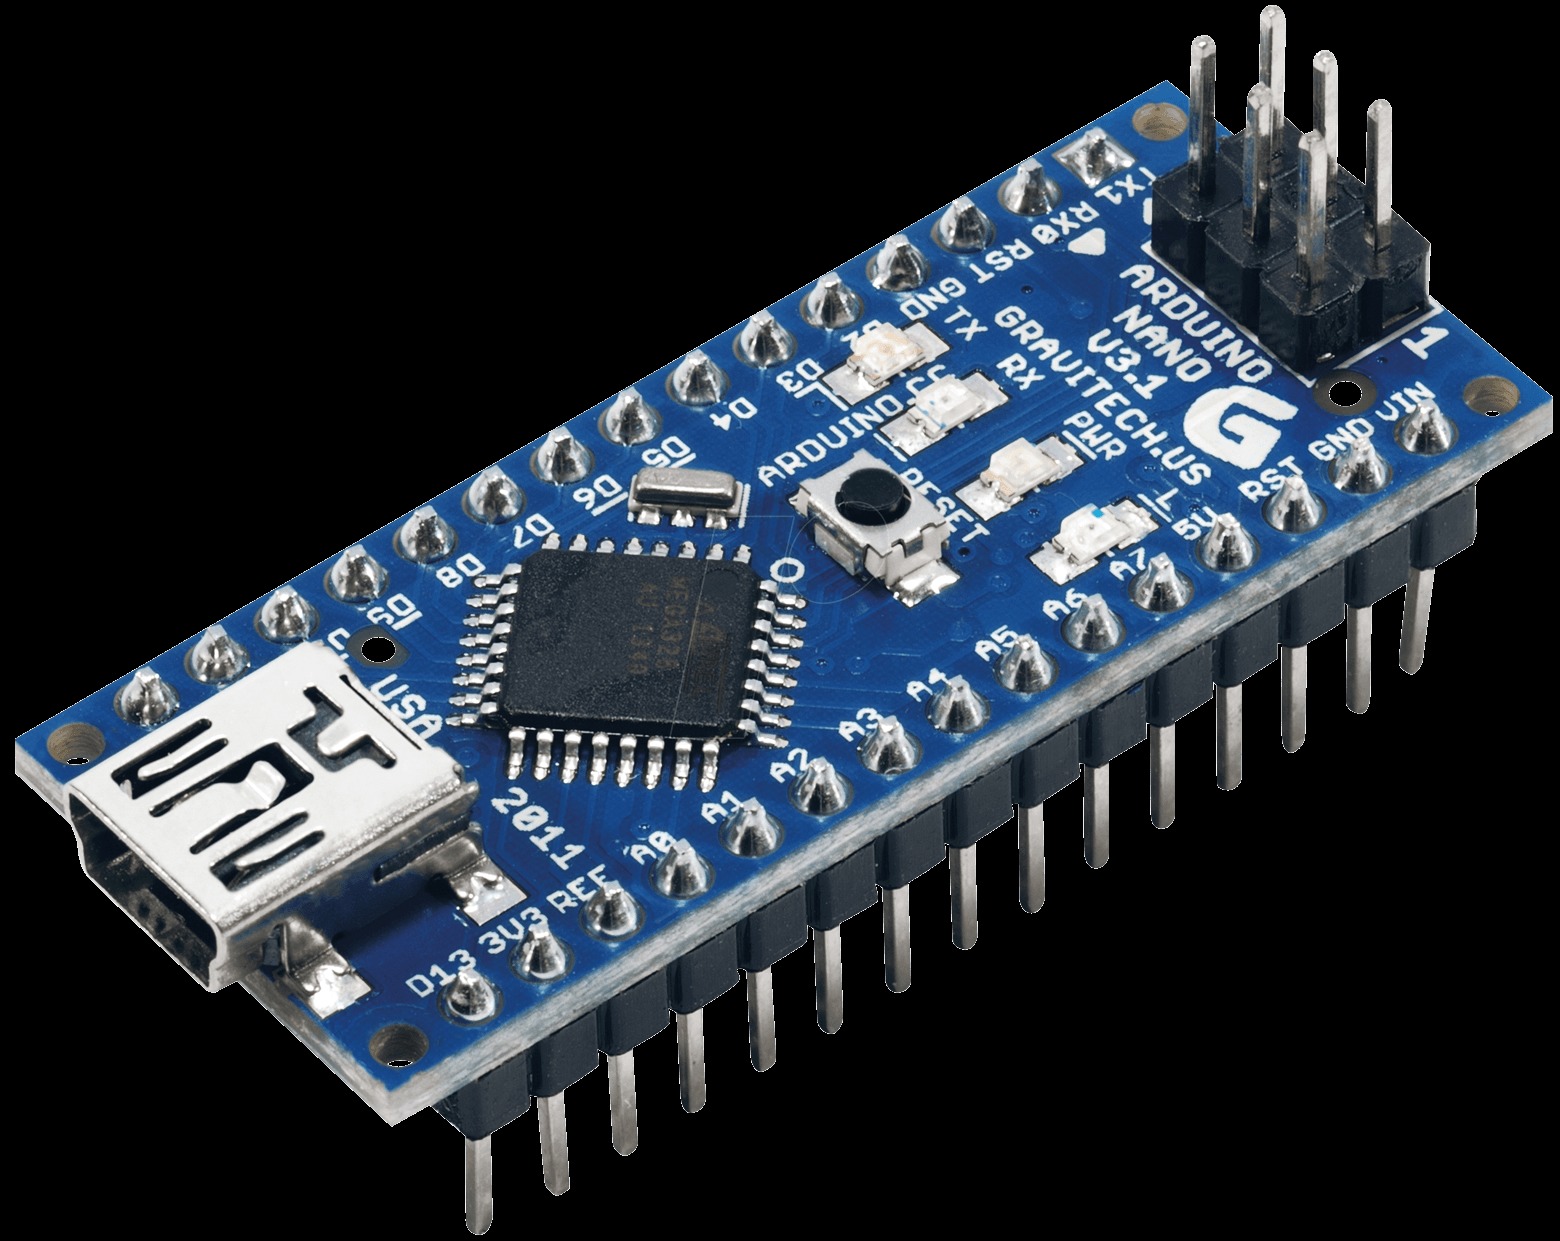
This board has exactly the same chips as a full sized Uno but packed a lot tighter, this can be a good choice if your project depends on the USB connection used to program the arduino. You can also get shield adaptors to bring this back up to full size, so it can be used as part of a modular approach.
Arduino Mini Pro
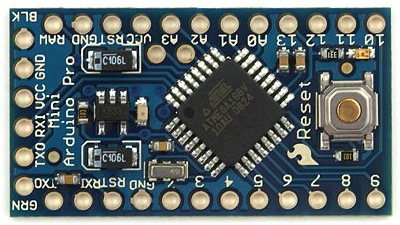
This board has the same main CPU as an Uno, but without the USB components, and is typically sold without the pins soldered, so is great for slipping into projects, and running wires directly to. A cheap USB-UART board can be attached to program the board, then removed.
There are several variants of this board available, with a choice of 5v or 3.3v regulators, and also a choice of ATMega 328 processor (same as Uno) or slightly lower spec ATMega 168. ProMini Pinouts
Raw Chips
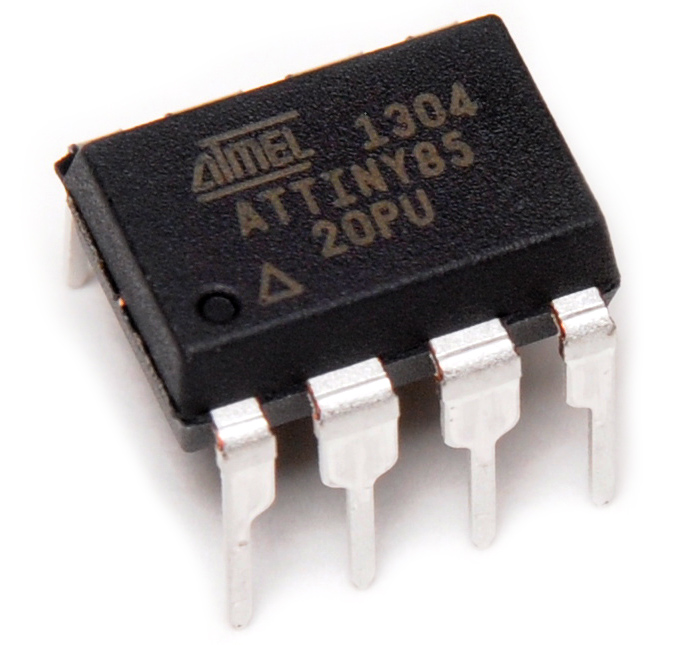
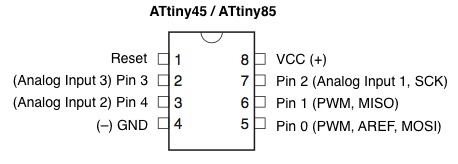
The ultimate in cut down circuits is to use just the Atmel chip directly in your project, this can be anything from the larger ATMega chips down to the tiny 8-pin ATtiny85 or similar chips, which can be used with little or no support components at all.
Programming
The nano already comes with USB and can be programmed just like an Uno, the mini pro should come with the same bootloader, and simply attaching 5v, gnd, rx, tx between them should be enough.
You can install the serial/usb bootloader onto a mini pro or ATMega chip using the following method.
To program an ATTiny (or to install a bootloader on a mega) you have to use the SPI port to program the chip, this can be done using an existing Uno or Nano board. Load and install the example program ArduinoISP into the board you wish to use as a programmer. Then wire from that board to the chip to be programmed like so.
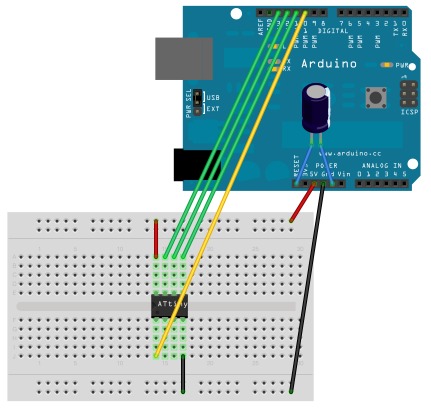
In summary you are connecting the pins as follows
| Uno Pin | Function | ATTiny Pin |
|---|---|---|
| 13 | SCK | 7 (Pin 2) |
| 12 | MISO | 6 (Pin 1) |
| 11 | MOSI | 5 (Pin 0) |
| 10 | Reset | 1 (Reset) |
| Vcc | 5v | 8 |
| Gnd | Gnd | 4 |
For the ATTiny chips you will now need to add these devices to your Board Manager.
From Preferences, add the following URL to Addition Board Manager URLs
Then from Tools -> Board -> Board Manager select and Install the attiny by David A. Mellis package.
You can now select the board type as 'ATTiny' and select the CPU and Clock speed you wish to use.
Use Tools -> Burn Bootloader at least one to configure the CPU (it doesnt actually install a bootloader) then you can Verify and Upload as per any normal Arduino project.
Disconnect the programmer and place the chip into your project.